Creating a request in the Jira Service Desk customer portal is fairly simple. Yet, there are times you might need to add details to your Jira Service Desk ticket. For instance, you may want to include item lists and quantities on the orders made for your internal IT team. Users also get regular updates so they know the status of each item and can get an overview of their global orders at a glance.
Users only have two options natively to track orders of multiple items in Jira Service Desk:
 |
 |
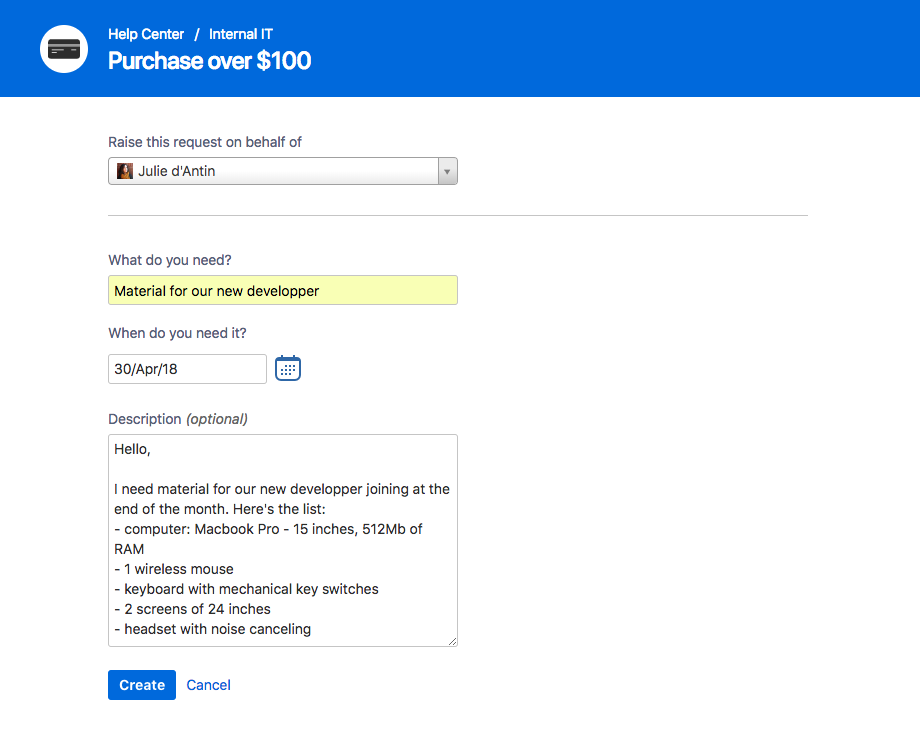
| 1. Type all your details in the description field that are not easy to digest for the agent. | 2. Attach a spreadsheet file that requires to be downloaded every time the customer or the agent wants to view it. |
Luckily, with our app Elements Checklist, there’s a better way for Jira Service Desk Cloud users. Why only the Jira Service Desk Cloud version you might ask? Unfortunately, the Jira Service Desk API on Server doesn’t allow us to integrate the Elements panel on the customer portal, not yet at least.
Cloud users have the option to enhance the experience you provide to your internal customers and Jira Service Desk agents with the use of Elements Checklist structured lists.
Requesting new material in Jira Service Desk using Elements Checklist structured lists
As previously explained in another blog, Elements Checklist provides structured lists within Jira issues. The project admin defines the structure of the table and where it appears, then end users can add as many items as they want in the Elements Checklist tables. We’ll use the following four attributes for our use case example:
- a text field for the item description
- a number attribute for the quantity
- another text field where users can add details about the item
- a select-list for the status of the item
Once the user creates a purchase request, the requirements need to be input in a structured list as shown below. The user appends the necessary information for each item on the list that needs to be purchased, adding the item details and quantity before submitting the request.
The Elements Checklist panel can’t be edited by the customer once the issue is created – only the agent can now make changes.
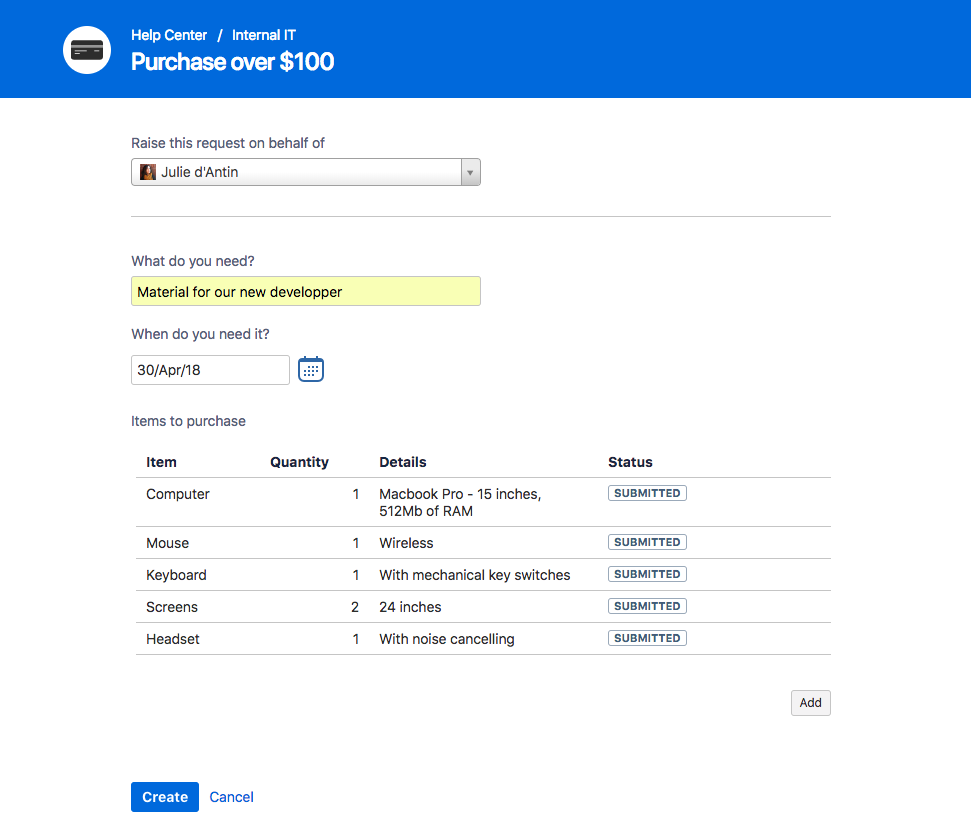
Now, you can say goodbye to spreadsheet attachments or wordy descriptions.
Viewing and editing the panel as a Jira Service Desk agent
On the other side of the portal, the agent instantly sees what needs to be ordered. It’s clear and the data is well presented in a panel within the issue view.
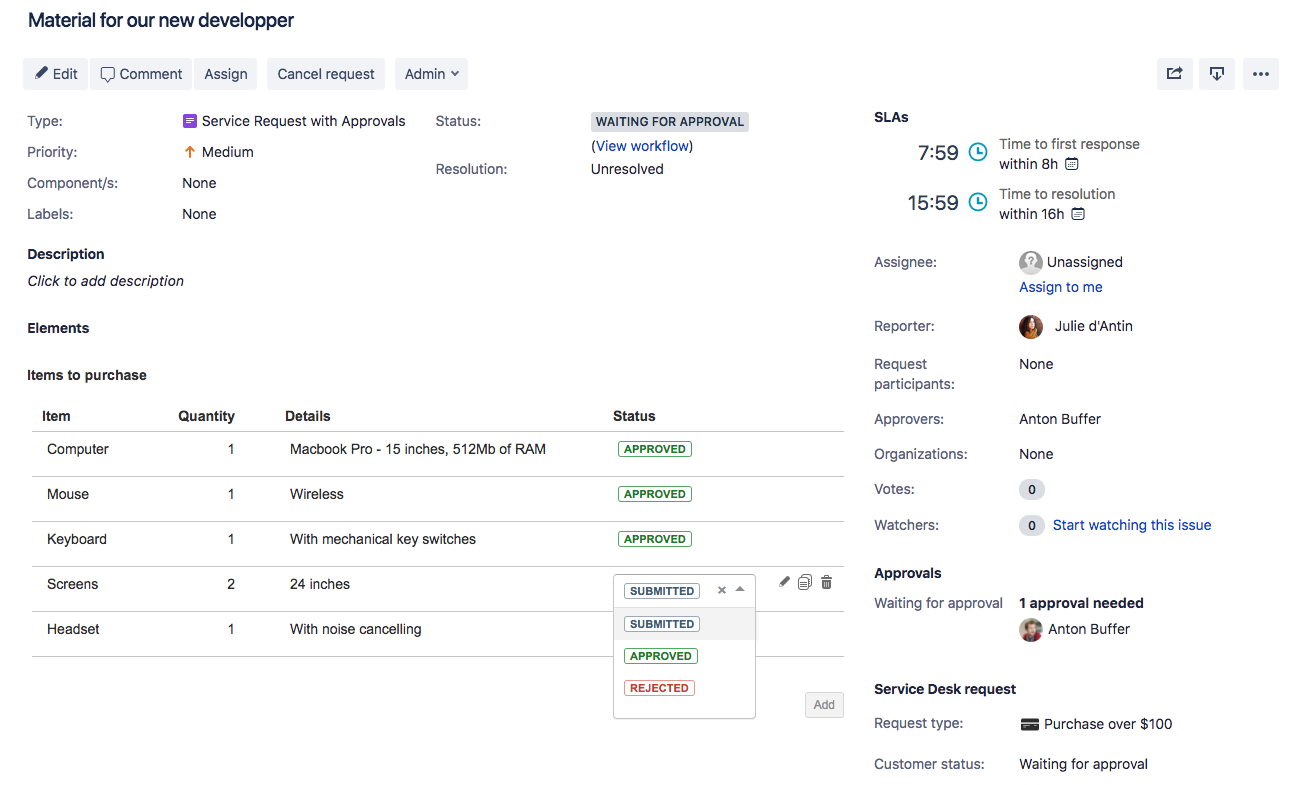
The agent can approve or reject each individual item by changing the value of the “STATUS” attribute in two clicks.
Sharing updates with the customer, everything is visible at a glance
The information in the Elements Checklist panel appears in the issue view on the portal and is always up to date. When the agent makes a change to an attribute, this automatically is reflected in the customer portal.
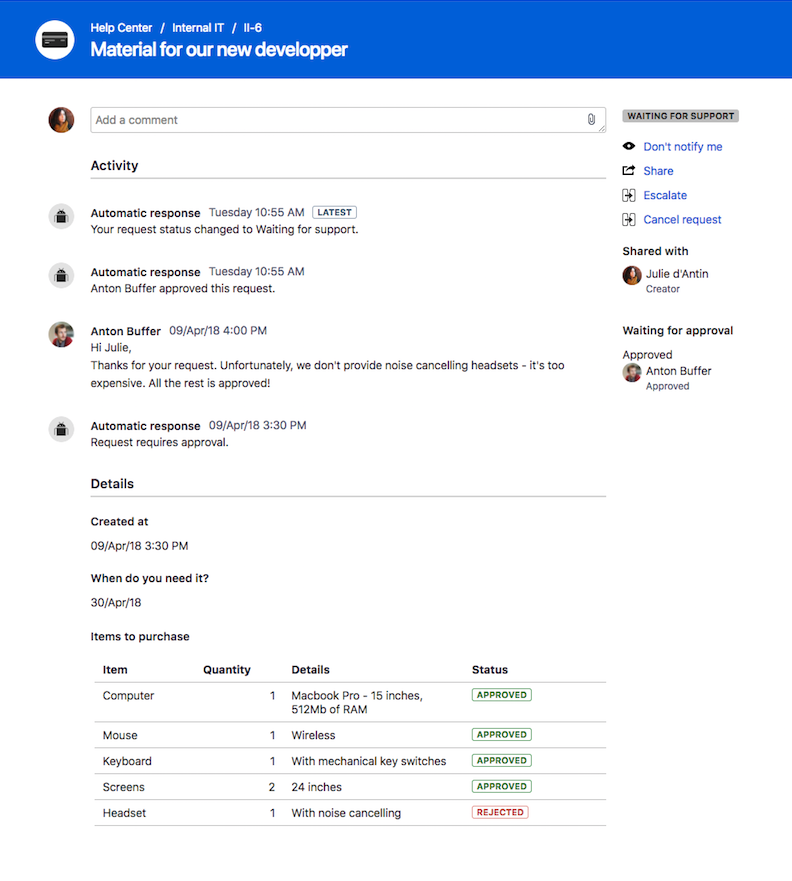
This allows you to create more transparency on the status of the orders placed.
Take your Jira Service Desk experience to new heights
Jira Service Desk is quickly becoming a vital tool for providing better services and support to internal customers of any kind in your organization, such as IT, payroll, facilities, purchasing and HR. Now every department is moving away from endless email threads and setting its support platform to manage incoming requests.
These departments often have business processes that require the use of structured lists. Elements Checklist panel can be easily configured by the Jira Service Desk project admin. In just a few clicks, the project admin can set up the Elements Checklist panel, choose the data that needs to be displayed using a wide range of attribute types and define the default values for attributes.
Try Elements Checklist for Free


