
Introduction
In today’s rapidly evolving tech landscape, the demand for flexible and powerful integrations between cloud services and internal platforms is growing. Companies increasingly require solutions that can bridge the gap between on-premises systems and cloud-native platforms, enabling seamless workflows and efficient data management. Atlassian Forge and Deno Deploy are two modern platforms that excel at handling these challenges, providing developers with a robust way to process data, respond to events, and integrate with Atlassian’s suite of services. And if you are thinking, “Wow, finally, I can stop duct-taping my workflows together,” then you are in the right place. In this post, we will explore how to harness Forge and Deno Deploy to create an application that can efficiently respond to events from outside of Forge. By combining these tools, you can build scalable, asynchronous workflows that respond to external triggers, perform complex processing, and sync seamlessly with Atlassian tools.
What Is Atlassian Forge?
Atlassian Forge is Atlassian’s cloud app development platform, enabling developers to create, deploy, and manage apps directly within Atlassian’s cloud ecosystem. Forge simplifies the development process by providing pre-configured resources, APIs, and functions specifically tailored for apps within Jira, Confluence, and other Atlassian products. Using Forge’s serverless architecture, developers can focus on their app’s logic without worrying about underlying infrastructure. In other words, Forge is where you go if you have ever thought, “I wish my app could live in the cloud without developing a cloud-sized headache.”
One powerful feature of Forge is its web triggers, which allow external systems to interact with Forge apps, making Forge a compelling choice for scenarios where external events need to be captured and processed within Atlassian’s ecosystem. This capability paves the way for building applications that can respond dynamically to data and events originating outside Atlassian tools.
What Is Deno and Deno Deploy?
Deno is a modern, secure JavaScript and TypeScript runtime that focuses on simplicity and a secure-by-default approach, developed by the original creator of Node.js. Built to address some of Node’s limitations, Deno provides features like built-in TypeScript support, a streamlined standard library, and a package management system that does not rely on a central registry. Deno is like Node’s younger sibling who, instead of breaking things in production, just calmly patches security flaws while sipping on TypeScript.
Deno Deploy is a serverless platform for running Deno applications at the edge, enabling fast and global distribution of applications. Deno Deploy supports asynchronous and computationally heavy tasks, making it ideal for offloading resource-intensive operations from platforms like Forge. By utilizing Deno Deploy, developers can handle complex workflows, process data streams, and manage large payloads effectively. Together with Atlassian Forge, Deno Deploy opens new possibilities for creating responsive, scalable integrations that can handle extensive processing requirements while seamlessly synchronizing with Forge applications.
Why use Deno Deploy?
Atlassian Forge is a powerful platform for building custom applications that integrate seamlessly with Atlassian products like Jira and Confluence, as well as external platforms like Deno Deploy but also carries certain limitations. App invocation times cannot exceed 25 seconds for synchronous operations (which includes UI modules) or 55 seconds for asynchronous events. This makes hosting long-running operations in Forge applications a challenge. We can solve this with Deno Deploy, which calculates runtime limitations in a very favorable way for the user if you can offload long-running operations to external services.
Deno calculates the limits for request execution by CPU time per request without considering async I/O. The limit of 50ms per request seems small at first but any awaits are not counted toward the execution limit. This means something like a multi-page translation request to an LLM can easily be initiated, await for minutes, then complete while only consuming milliseconds of CPU time. Deno Deploy is an ideal option for quickly deploying services that lean heavily on async I/O without having to worry about how long any individual async operation might take to complete.
Atlassian Forge + Deno Deploy Using a Forge Web Trigger
One of the key features of Atlassian Forge is the web trigger, which allows communication between Forge apps and external services. A web trigger acts as a public HTTP endpoint that external systems can use to communicate with a Forge app. This means that any system outside of Forge, such as Deno Deploy, can send HTTP requests to trigger specific functions within a Forge app. Additionally, a Forge app can also use Web triggers to communicate with other Forge apps or even trigger itself.
Web triggers can be used to create entire APIs, static websites, and much more. In our example, we will have a Deno Deploy app running independently, and it will use a web trigger to communicate with our Forge app. This interaction will enable us to interface with Atlassian products like Jira and Confluence, allowing for real-time responses, data processing, and other dynamic interactions.
Creating An Atlassian Forge Web Trigger
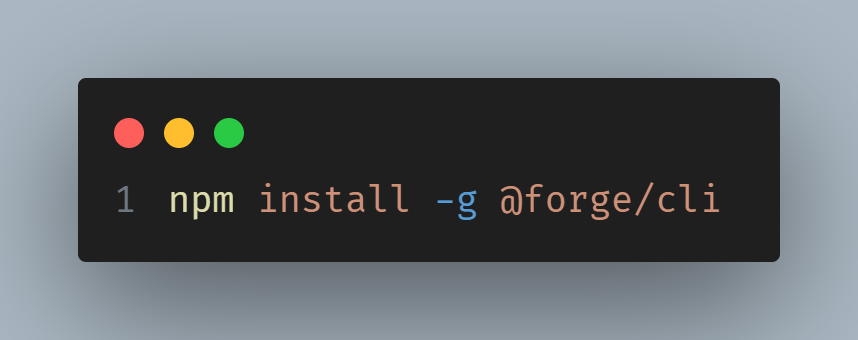
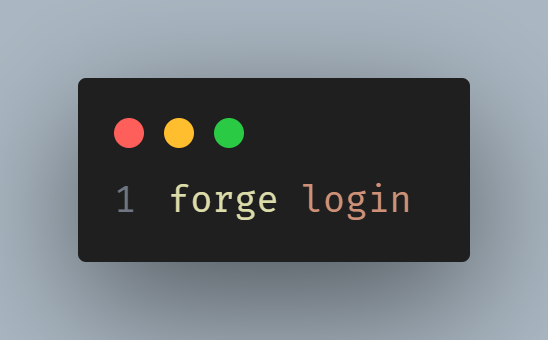
The first step in setting up our Forge + Deno Deploy integration is to create a simple Forge app. Forge’s development process is straightforward, leveraging its CLI to scaffold apps and manage app functions. Before anything else, ensure that you have the Forge CLI installed. If you have not installed it yet, follow these steps:
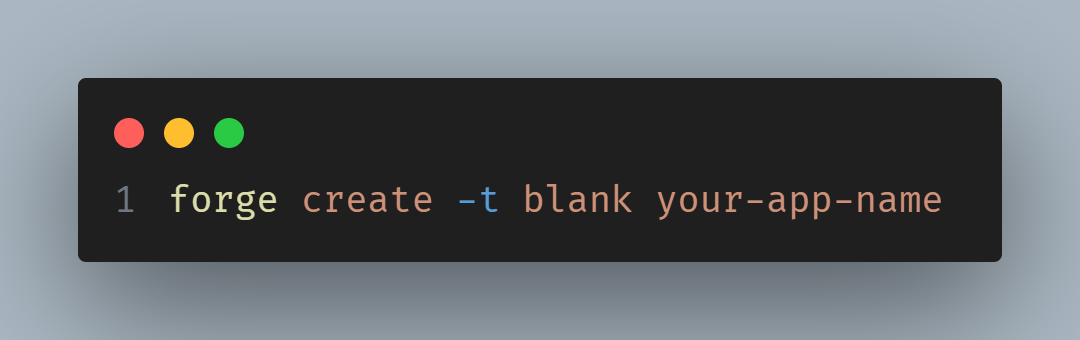
Now that you are logged in let us create a forge app, using the blank template and pick a custom app name.
Now that your app exists, let us go ahead and update your manifest file to create a web trigger.
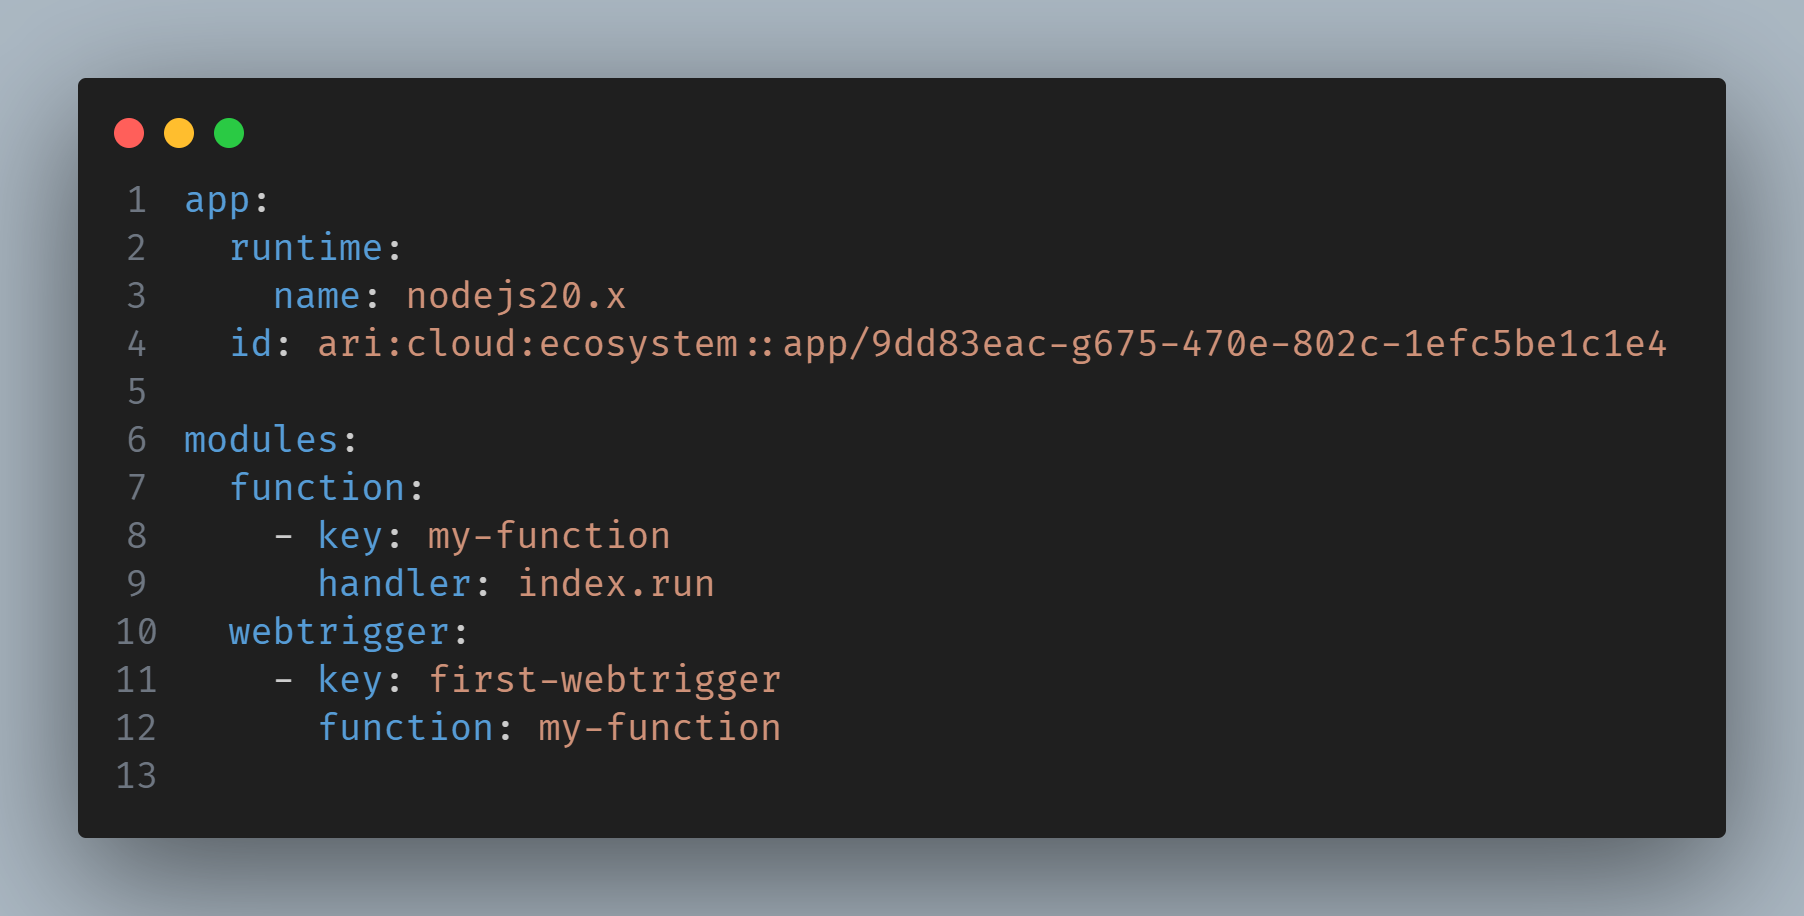
In the code above, we have created a function module called `my-function` and provided a handler function called `run` in the `src/index` file. The web trigger will now execute that function whenever it is triggered. Now jump into the index file and change the code to the code shown below to make the web trigger work properly and return a valid response.
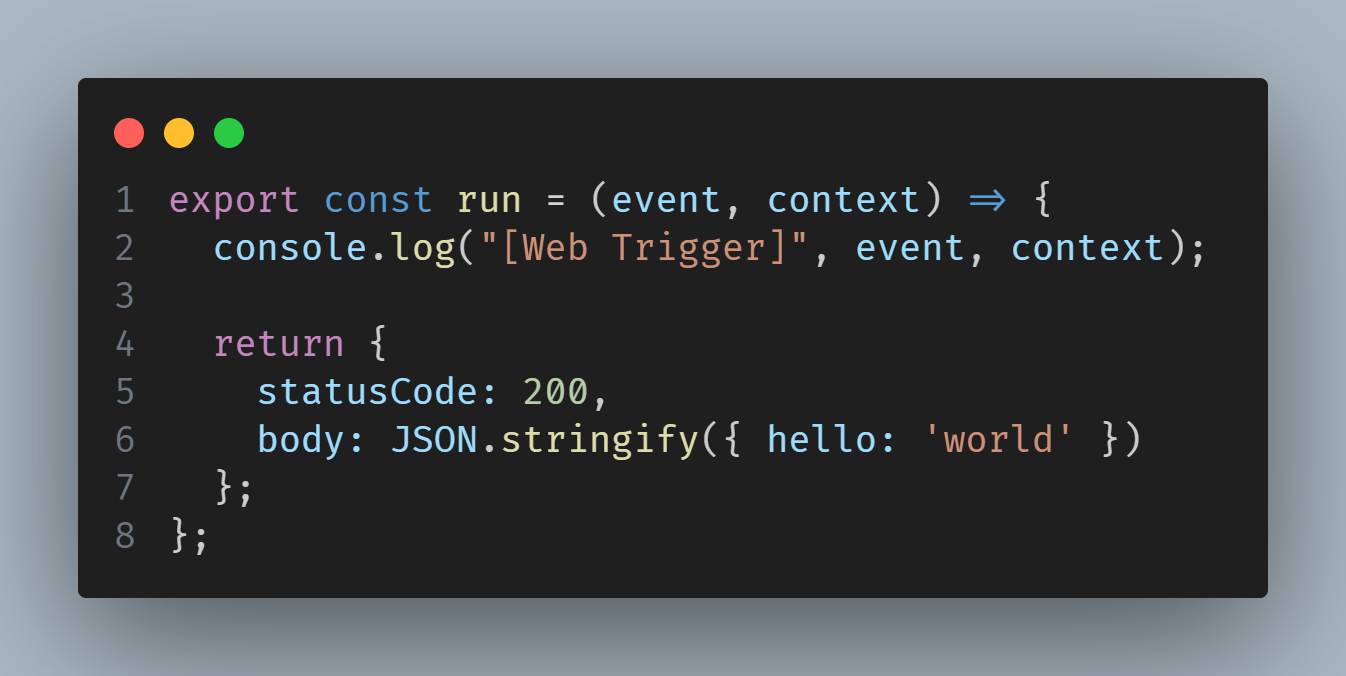
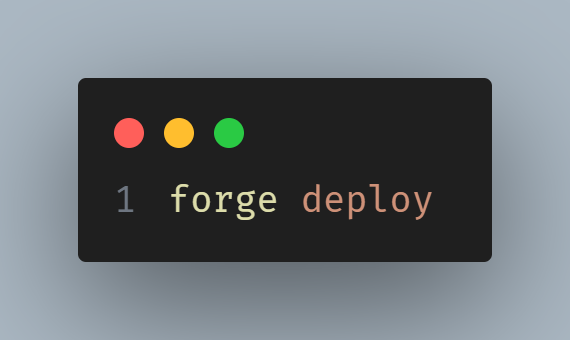
It is particularly important to know that when forge created this template, it was not a valid code for a web trigger. A web trigger requires us to return an object with a property called `statusCode` which is of type number and an optional body property which is of type string. You can also pass on any other options but for our purpose this is enough. Now, let us deploy this code and test our web trigger so far.
Our code has now been deployed successfully, next is to install this forge app on our instance. So, let us run
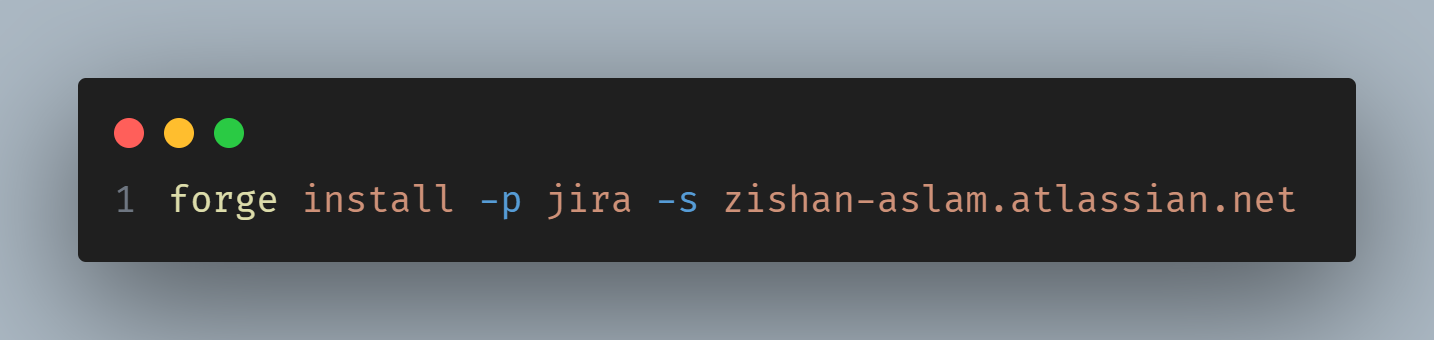
This will install our forge app on Atlassian Jira Product which we provided with the –p flag, short for product, and then it will install the app on zishan-aslam.atlassian.net as provided with the –s flag, short for site. Now that we have the app created, deployed, and installed on an instance, we can go ahead and get our web trigger URL.
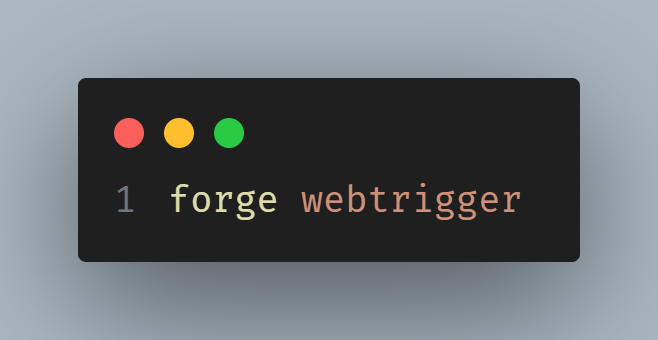
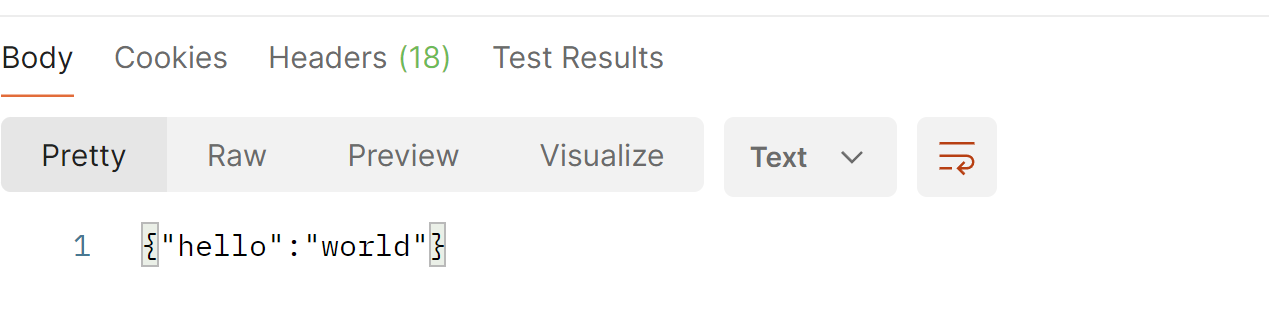
This will now ask you to select the name of the web trigger which we set in the manifest file earlier and the website where we installed it. Once you select both, we will get the URL for our web trigger endpoint. We can finally test our code now. Let us go ahead and throw this URL on Postman and test our web trigger code. Making a simple GET request using Postman we get back a nice clean response.
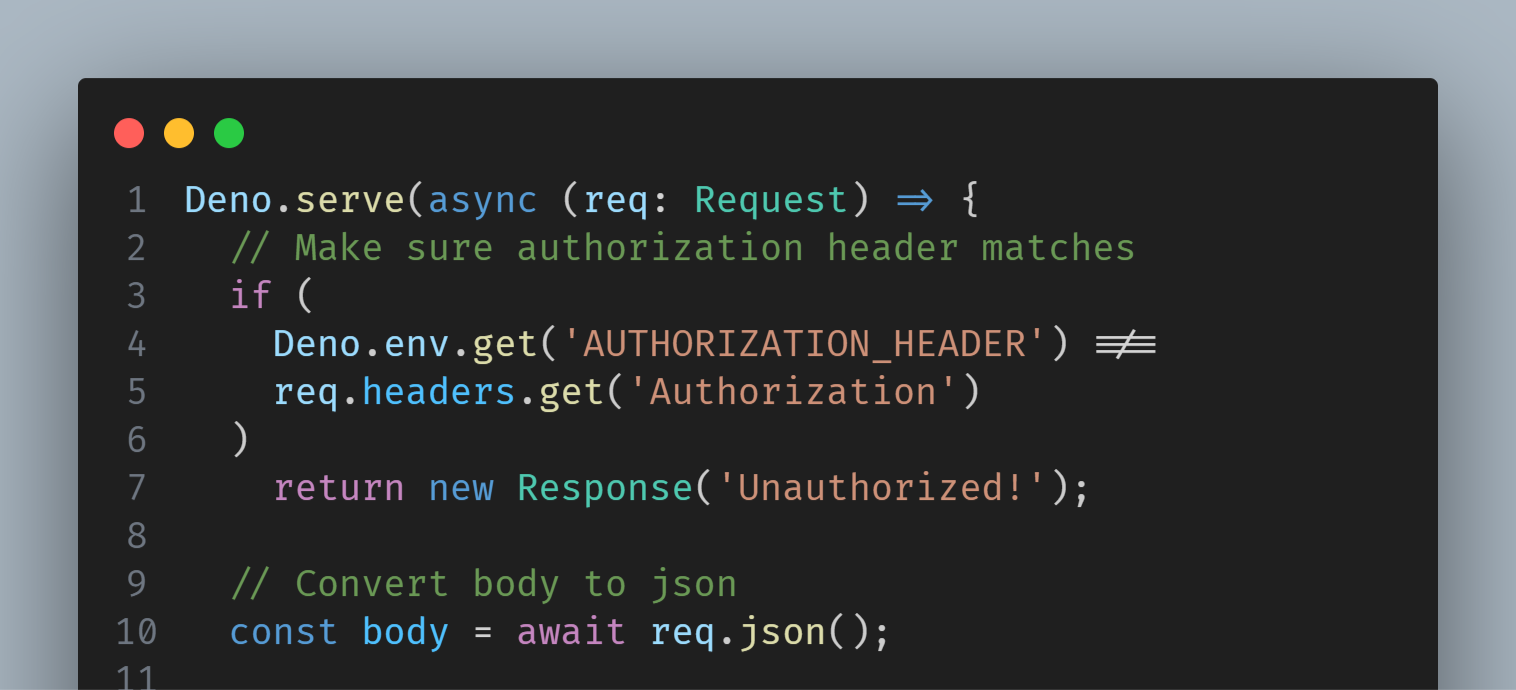
Now, let us take this chance to add some security checks into our web trigger. Why? Because a web trigger is a public endpoint so if anyone gets access to your URL, they will be able to talk to it. We want to make sure that only we get to access this web trigger.
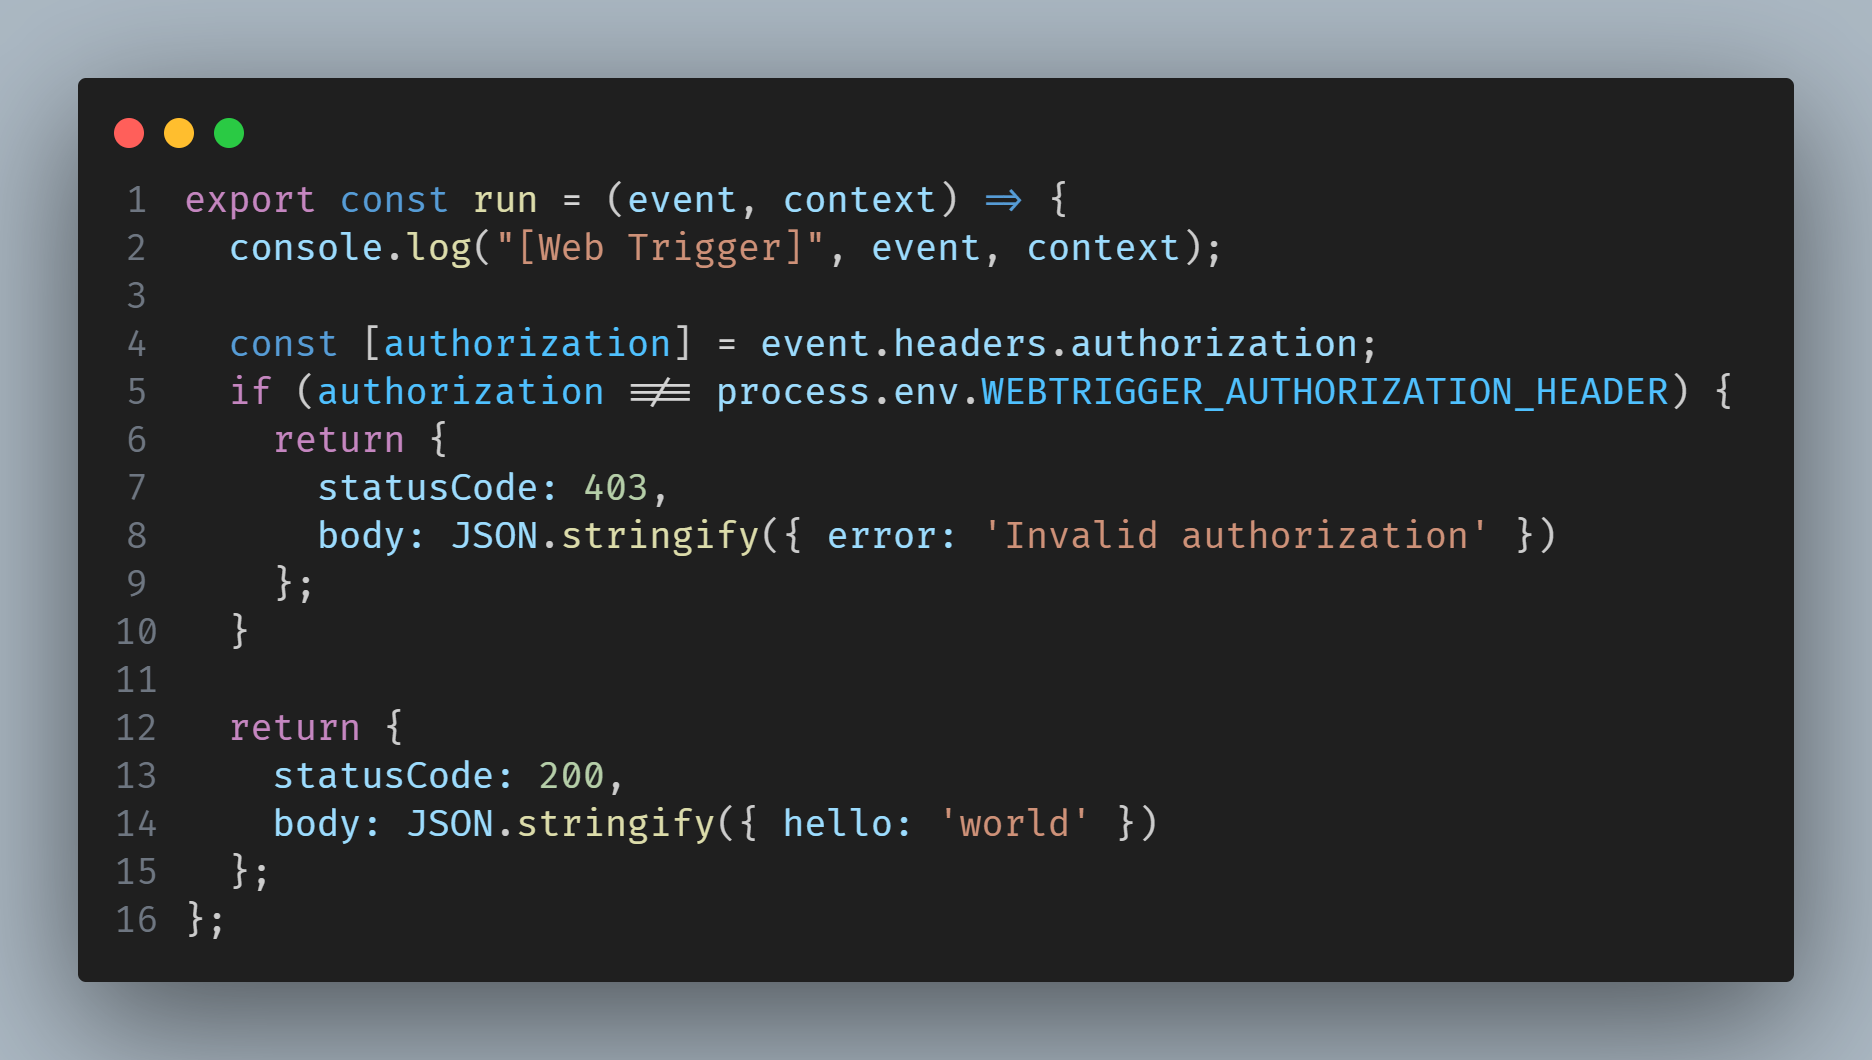
You can now test this code with and without the authorization header. Make sure to add the authorization header in the environment variables.
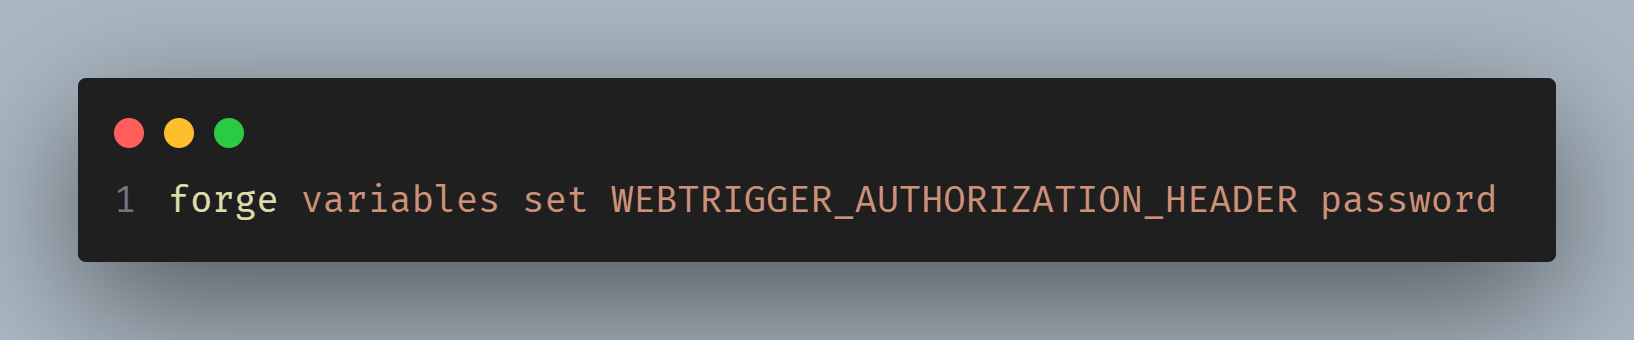
You should also take this opportunity to save it in a .env file so we can use it when tunneling.
WEBTRIGGER_AUTHORIZATION_HEADER=password
Go ahead and deploy these changes with forge deploy. Now we have a working web trigger that listens for incoming requests and only allows requests from any sources that are given our authorization header. Let us jump over and create our Deno Deploy instance.
Creating A Deno Deploy Server to Process AI Translations
To create a simple Deno Deploy instance, go to deno.com/deploy. Then sign in using your GitHub account and create a simple playground for now. First, we do some security checks for sanity just to make sure the request is from us. Once the authorization checks pass, we convert the request body to JSON.
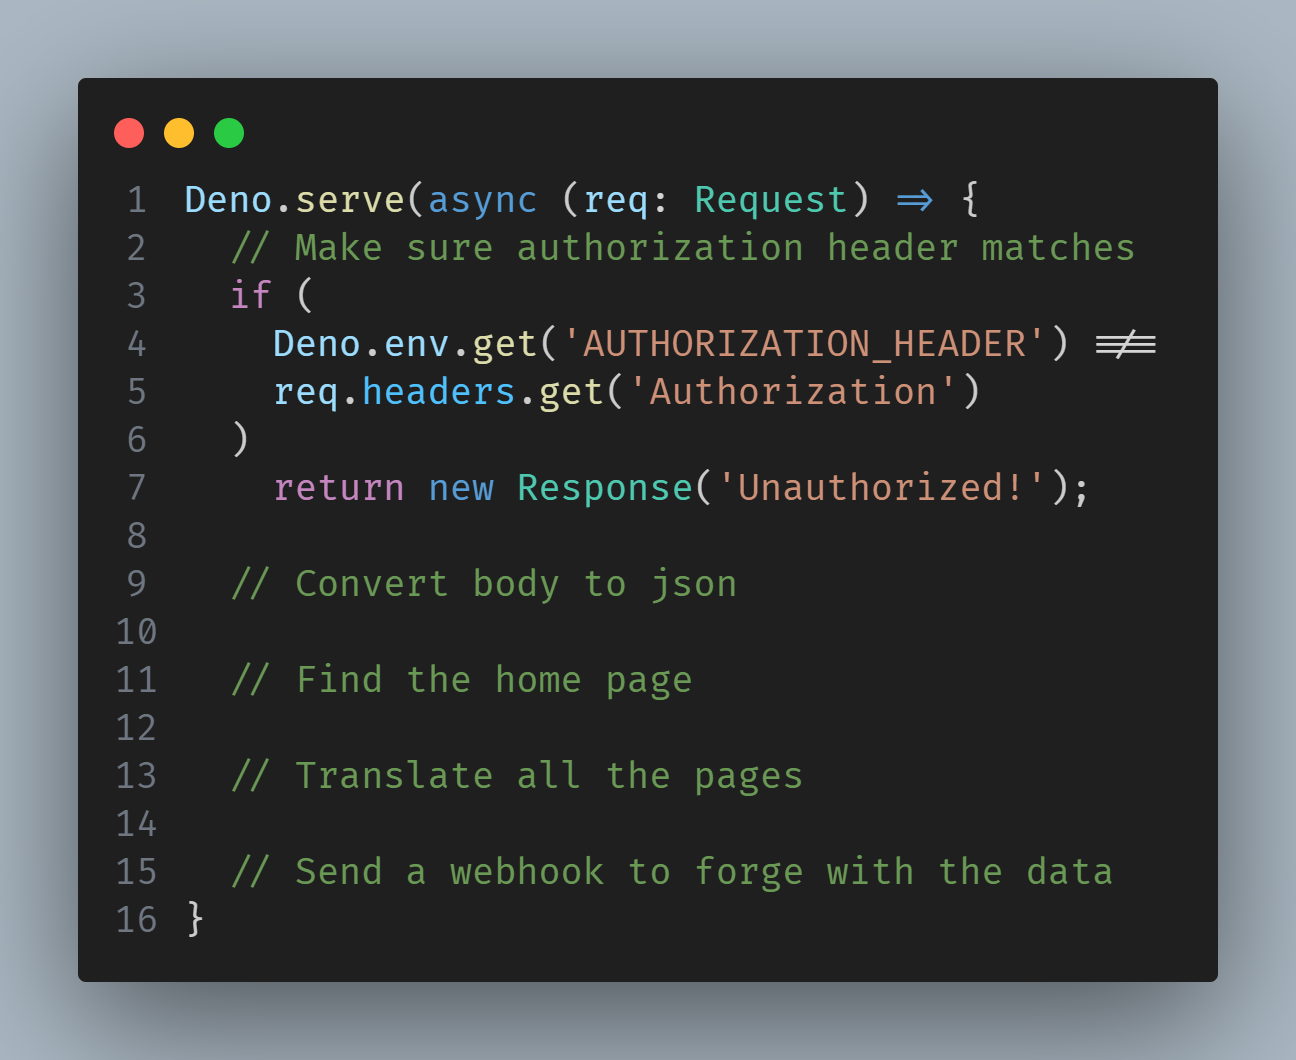
Sweet, now the authorization check code is in place. But we need to take a minute and add that Authorization header to the Deno Deploy environment variables. Click the settings button at the top of the playground and you will see an option to add an environment variable.
Note: I recommend taking the time to add some more security checks here like making sure that the payload is in the schema we expect. Making sure that `pages` property exists and is an array.
Begin AI Translations Using OpenAI
Once you have added the environment variable, let us add more code.
With the new code added here, we are converting the body in the request to a JSON format. Note: We will skip the actual translation code in this guide using OpenAI as the goal of the post is to show the connection logic between Forge and Deno Deploy
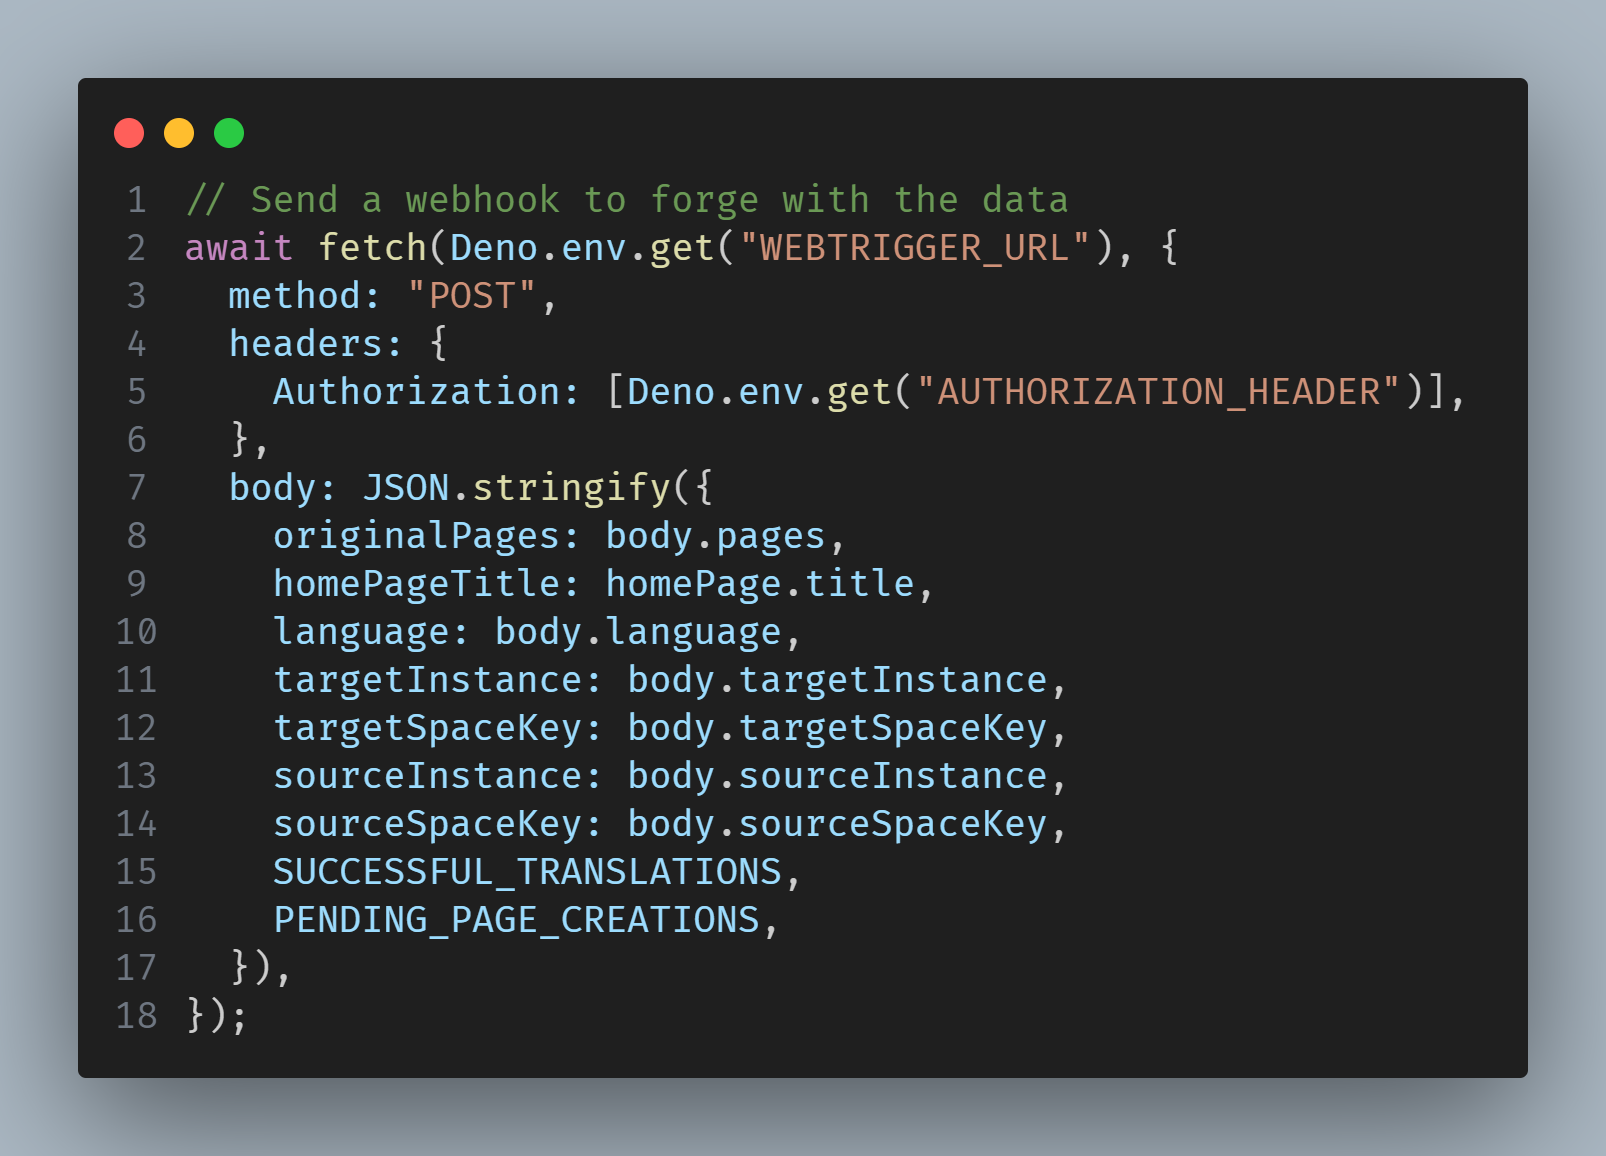
Sending Data from Deno Deploy to Atlassian Forge
To send this translated data to Forge so that Forge can create all these pages.
Creating AI Translated Confluence Pages with Atlassian Forge
Now go back to our forge code and build the handling for creating these pages.
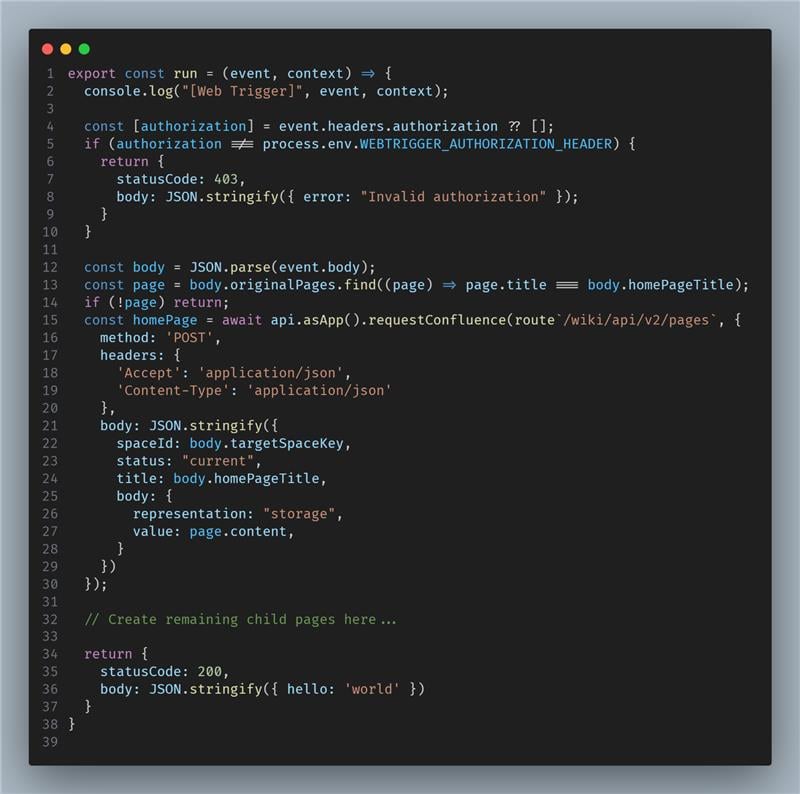
Above we made changes to the original web trigger handler. We parse the incoming event body and assign it to a variable called body. Using that, find the payload relevant to the home page. Once we have that we use Atlassian Forge APIs to create a confluence page.
Note: To finish this off, you can replicate the concept into creating all the child pages that we created using each page’s parentPageId property.
There are several other improvements you can make here, and it can be a fun challenge to try to complete this and optimize this further. I highly encourage taking the time to tweak and experiment with this as much as possible. There are many ways to do this, for example, we could use Forge Remote, if the original request came from inside Atlassian. Atlassian is producing new features which are still in beta that would go a long way in making this easier. For example, Rovo could be used here to do the translation along with Automations to automatically trigger Rovo to update and maintain translated versions. Furthermore, we could even use the Long Running Functions feature which is currently in EAP to handle a lot of this now.
Conclusion
Now you have seen how to leverage Forge, web triggers and Deno Deploy to create an application that can respond well to events originating outside of Forge. In our example scenario we went through a situation where a script is used to upload files from an on-prem solution which then triggers translation on our Deno Deploy integration before being sent off to Forge to be stored in Confluence pages. This pattern of responding to external events, running heavy async operations in Deno Deploy and then integrating with Atlassian services through a Forge application can be applied to many other scenarios. We hope that this example will help the community further explore and leverage the Forge platform toward creative and robust solutions.