In the first part of this blog last week, I talked about how Confluence can be used to capture customer and stakeholder requirements around projects.
In this week’s blog, we will be focusing on managing project requirements in JIRA to complete the requirement lifecycle.
Establishing a review process
We previously saw the business analyst break down requirements into stories and create JIRA tickets from Confluence – but that doesn’t mean the requirements are ready to be implemented! The product owner needs to review the requirement (asking a product architect or technical lead to help with technical aspects of the requirements) before beginning the implementation. This will prevent wasting the development team’s time during the sprint planning session.
Configuring your workflow is the first step to managing project requirements in JIRA. Here’s how its done:
Step 1: Create a workflow
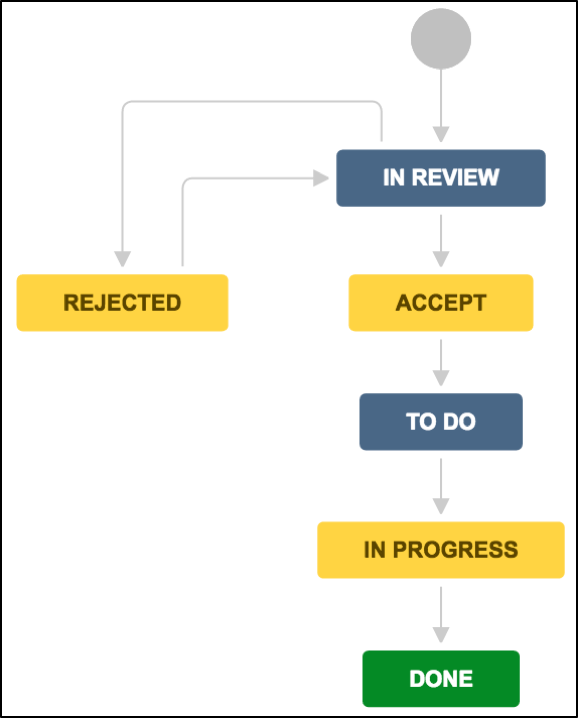
I’ve created a workflow with a simple review process before starting the development work. In your case, you can expand on this to include more statuses for review, or add approval stages based on your team’s needs.
Step 2: Create a filter
Since we are reviewing the data before starting development, we’ll have to create two boards:
- A kanban board for the review process by the product owner and technical lead.
- A scrum board for the product backlog and sprint board for development team.
I’ve used the kanban board for the requirement review as this makes it easier for the product management team to visualise the workflow process. Once a ticket reaches the last column it will appear in the product backlog, which is a different board (i.e. scrum board).
How to configure your boards
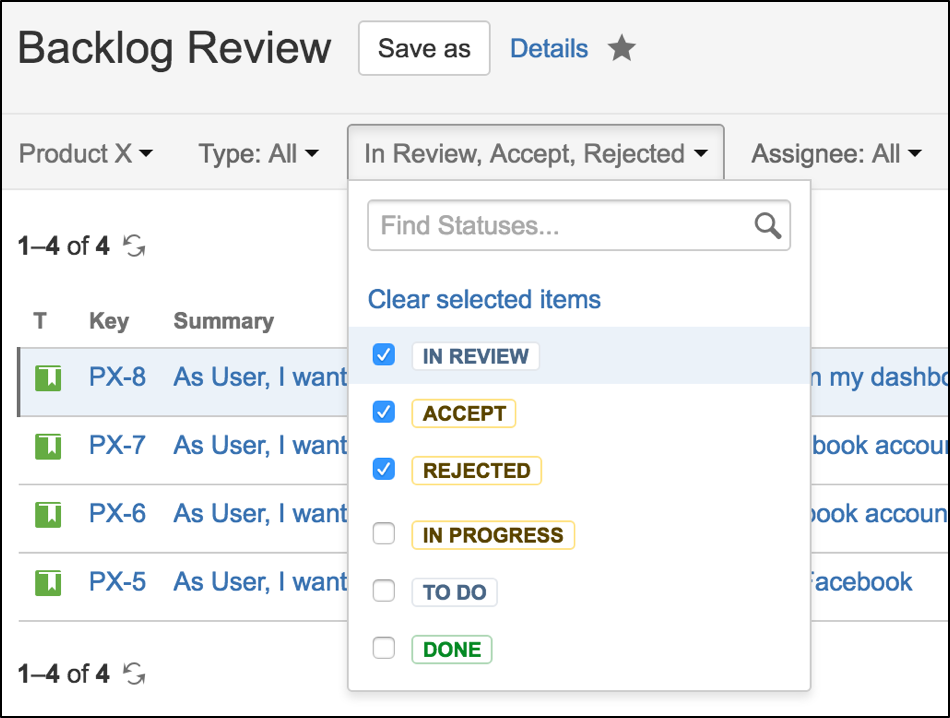
- Create a filter that captures only the review part of the workflow. In the example workflow, select the status (review, accept or rejected) then save the filter as shown below. (Note: ensure your filters are shared with a project, or other users won’t be able to see your board).
- Create a similar filter that captures the development side. Select the status (to do, in progress or done), then save the filter.
- Create a kanban board for your project.
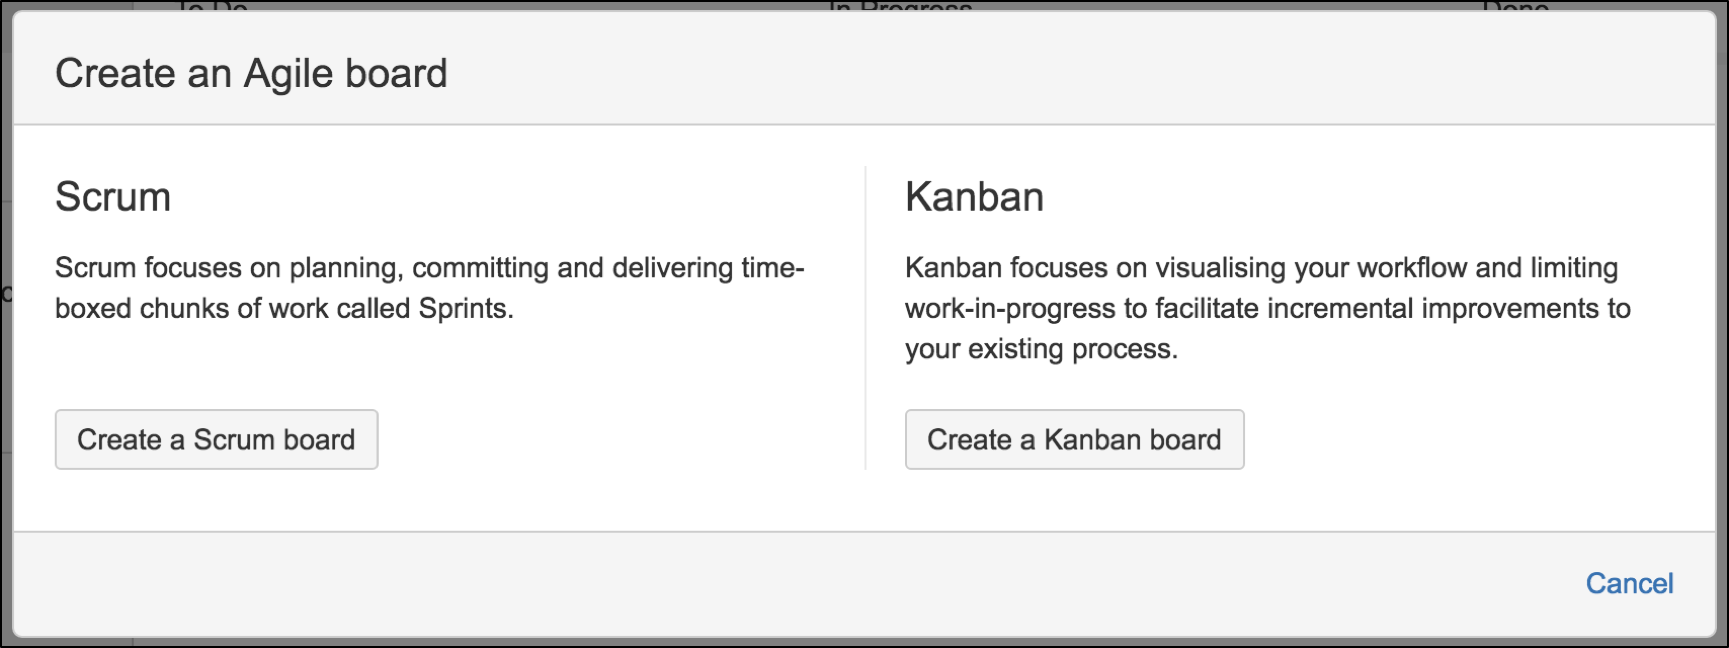
- Click on “Board from an existing Saved Filter”.

- Finally, give your board a name and select the filter you’ve just created for review.
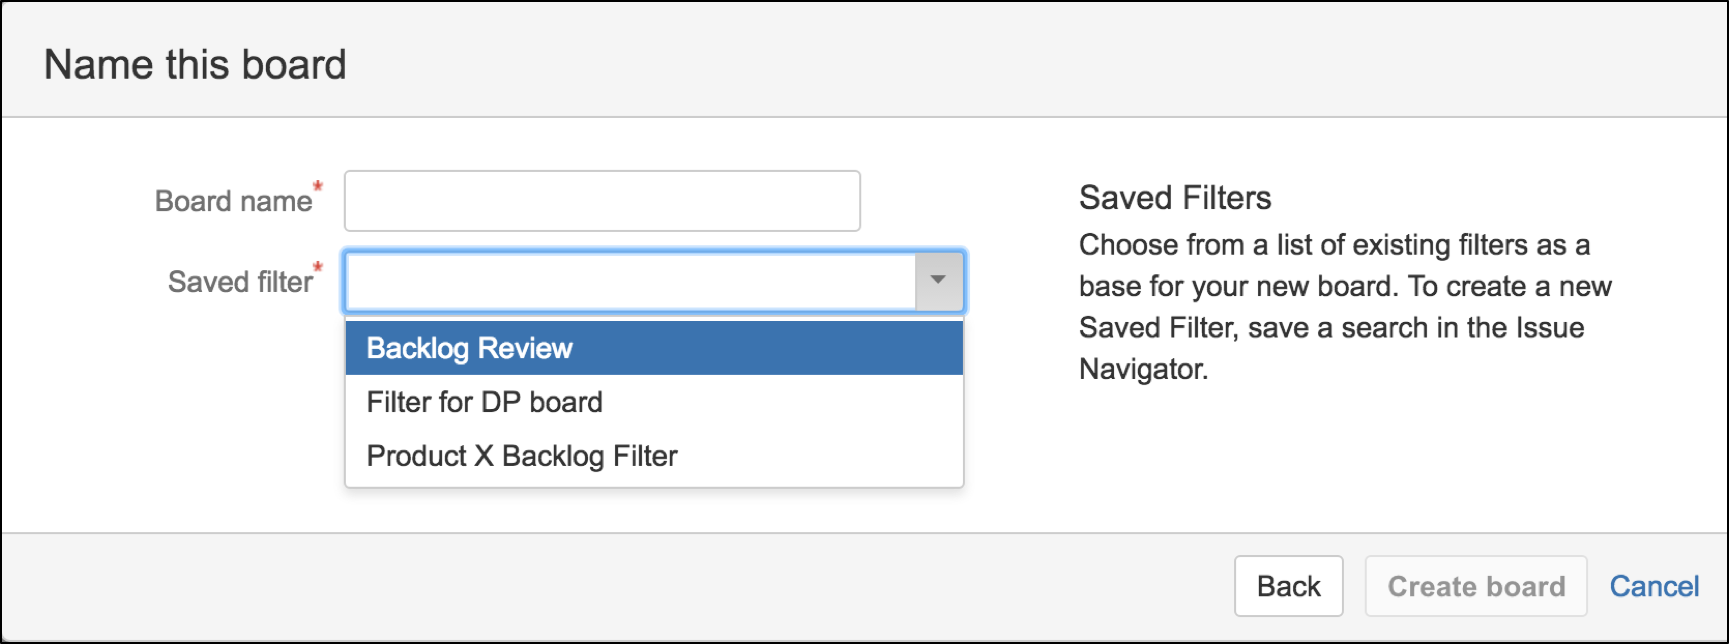
- Repeat the above steps for the scrum board and select the other filter you’ve created for development.
- You can switch between boards from your project overview page as shown below:

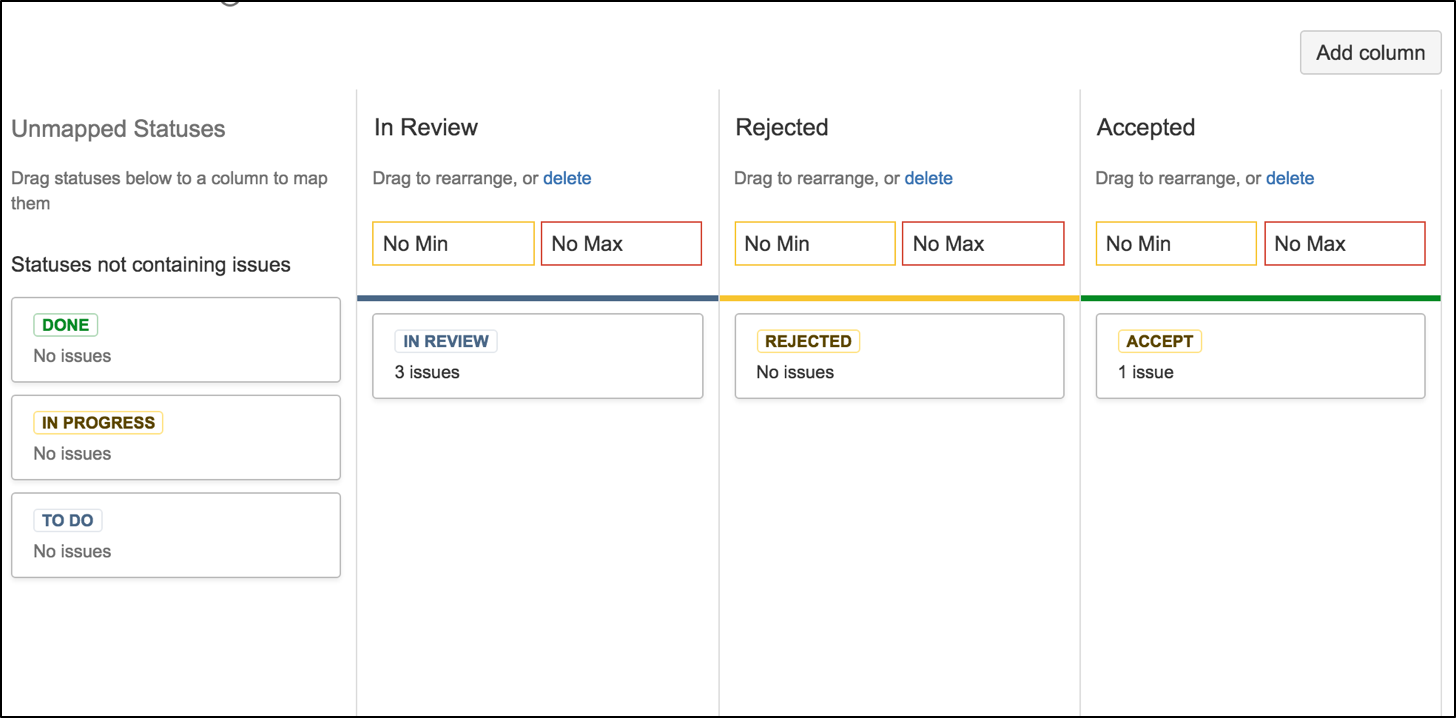
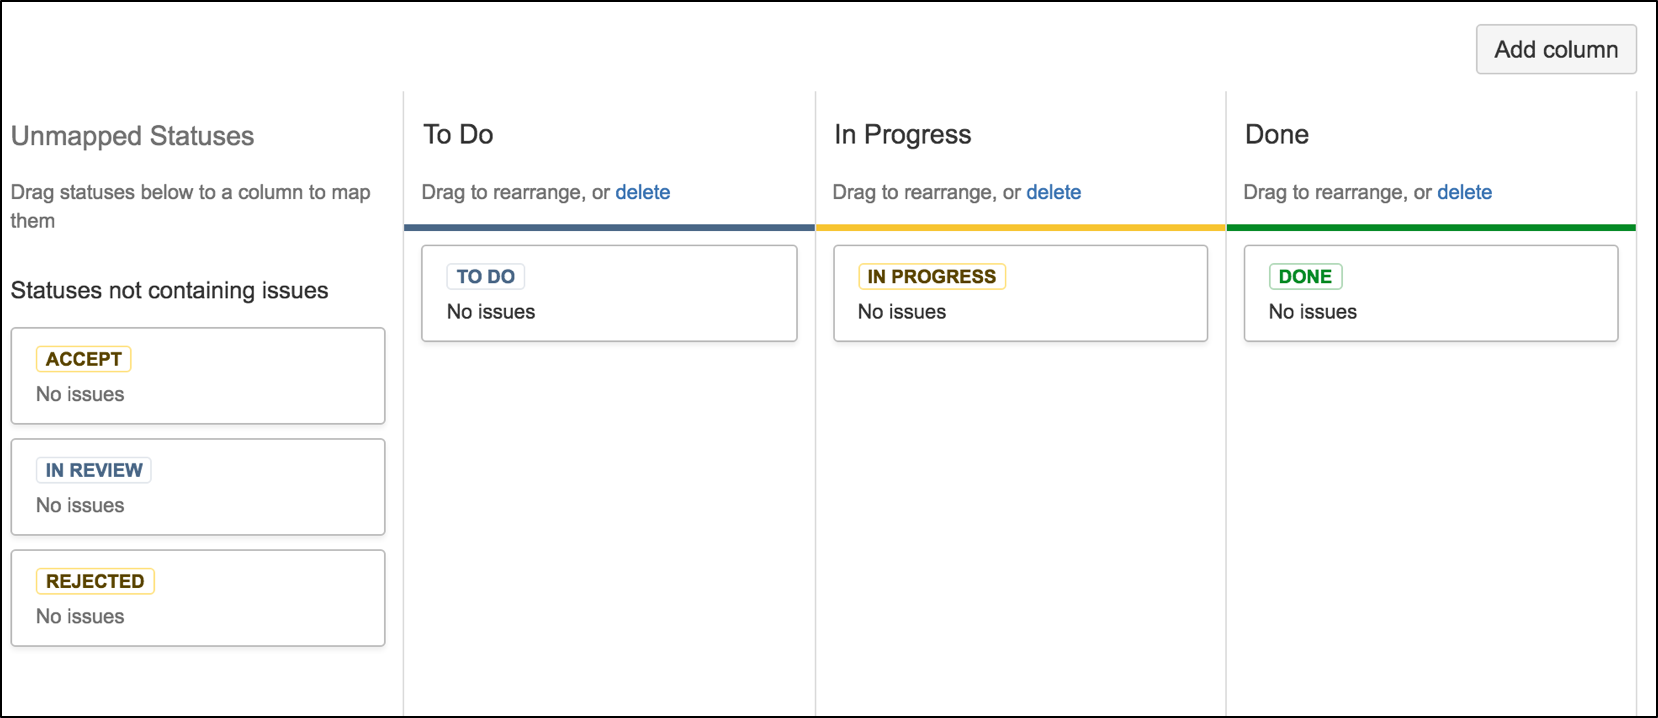
Step 3: Configure the columns in your boards
The next step in managing project requirements in JIRA is mapping the workflow status to the columns in your boards.
- In Review, the Accept and Rejected status will be mapped in the kanban board columns.
- The To Do, In Progress and Done status will be mapped in the scrum board columns.
Now test your boards by creating a ticket and dragging it through the kanban board columns, then from your backlog to a sprint in scrum board. (Note: While you’re implementing all these changes in JIRA, the Confluence requirement page ticket status will be updated automatically.)
Congratulations – you’ve managed to configure a requirement lifecycle successfully using JIRA and Confluence!