Speed and demand are the two principles that govern projects and systems management in our daily lives. To better stick to these principles, you need to be able to see clearly how projects develop. Hence the creation of the backlog!
The backlog ensures that teams always have access to the latest version of the product roadmap. For this reason it must be organized and prioritized carefully.
If you’re interested in organizing your backlog in Jira Software, here are a few, simple tips.
Just what is the backlog?
The backlog, also called the “product book”, is “an ordered list of everything that might be required in the product, and is the sole source of requirements for any changes to be made to the product. It is a document that evolves constantly during the life of the product and is never finished.” (reference)
At the beginning of the project, the development team is focused on a small backlog that contains the requirements collected from the various business stakeholders. This first backlog usually consists of the features that are needed to publish the product.
However, from the moment the first version of the product is published, the number of requests, improvements, and bugs reported by users considerably increases the size of this backlog. From then on, the product manager will have to filter and order the backlog by relying on different variables, such as impact on activities, the ability of the development team to resolve the request, and user experience.
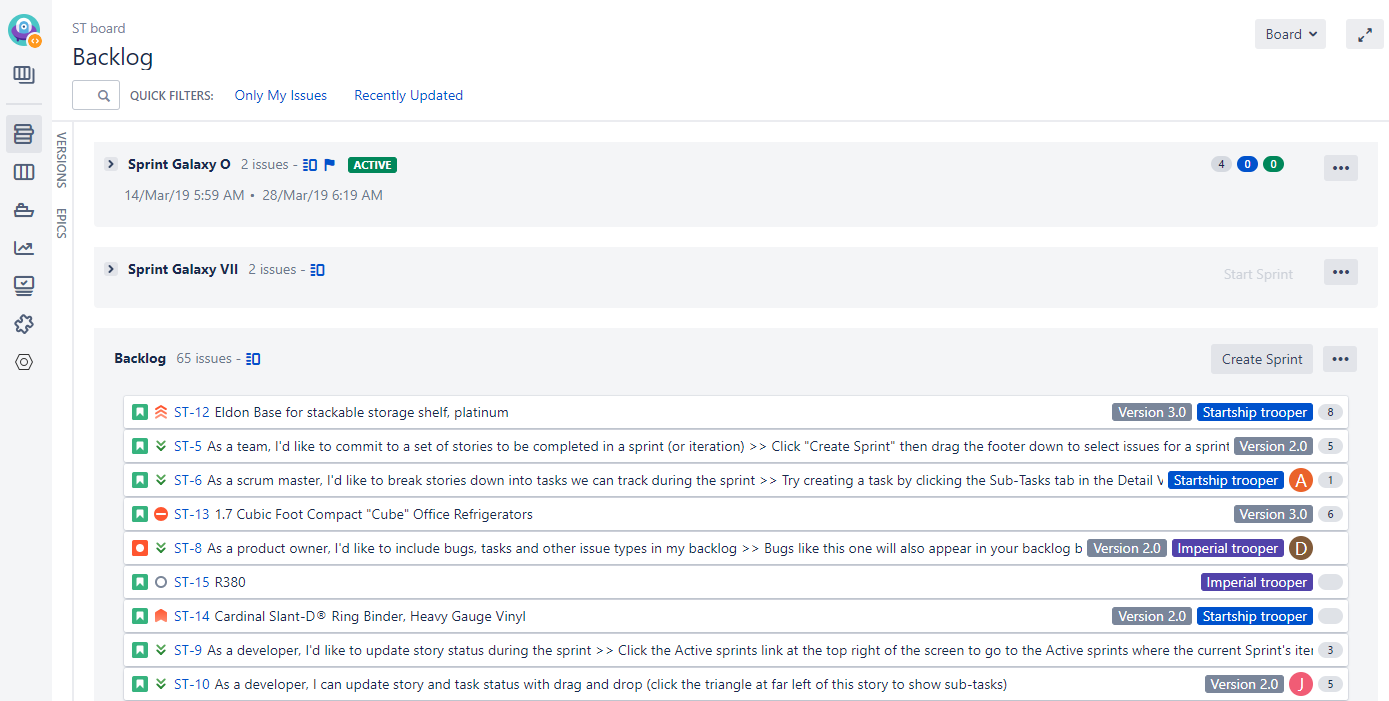
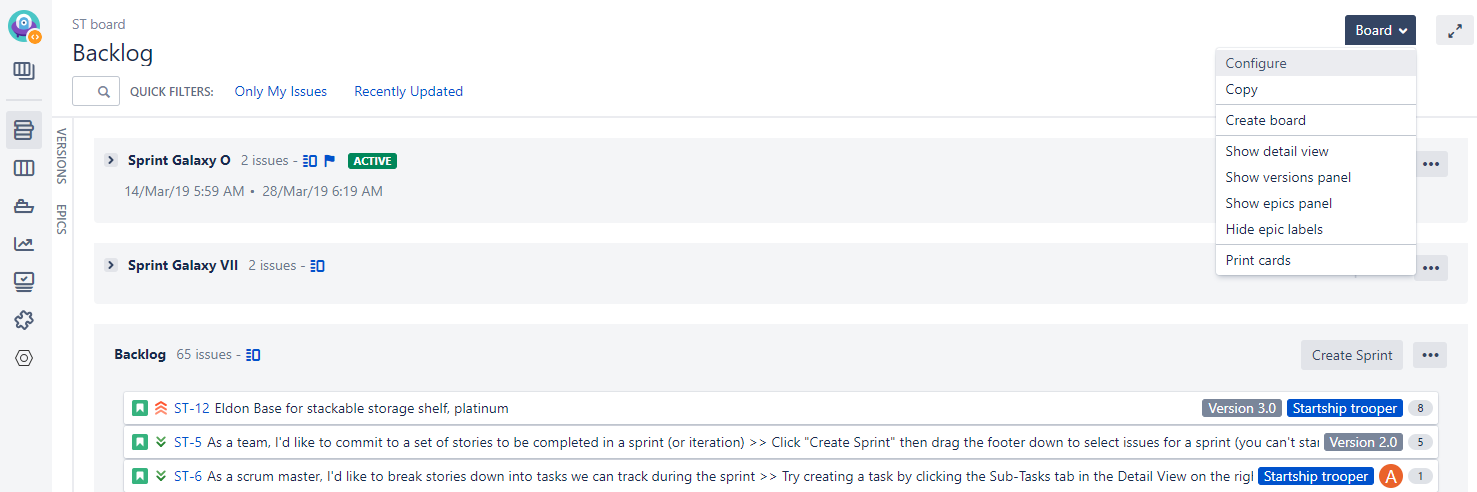
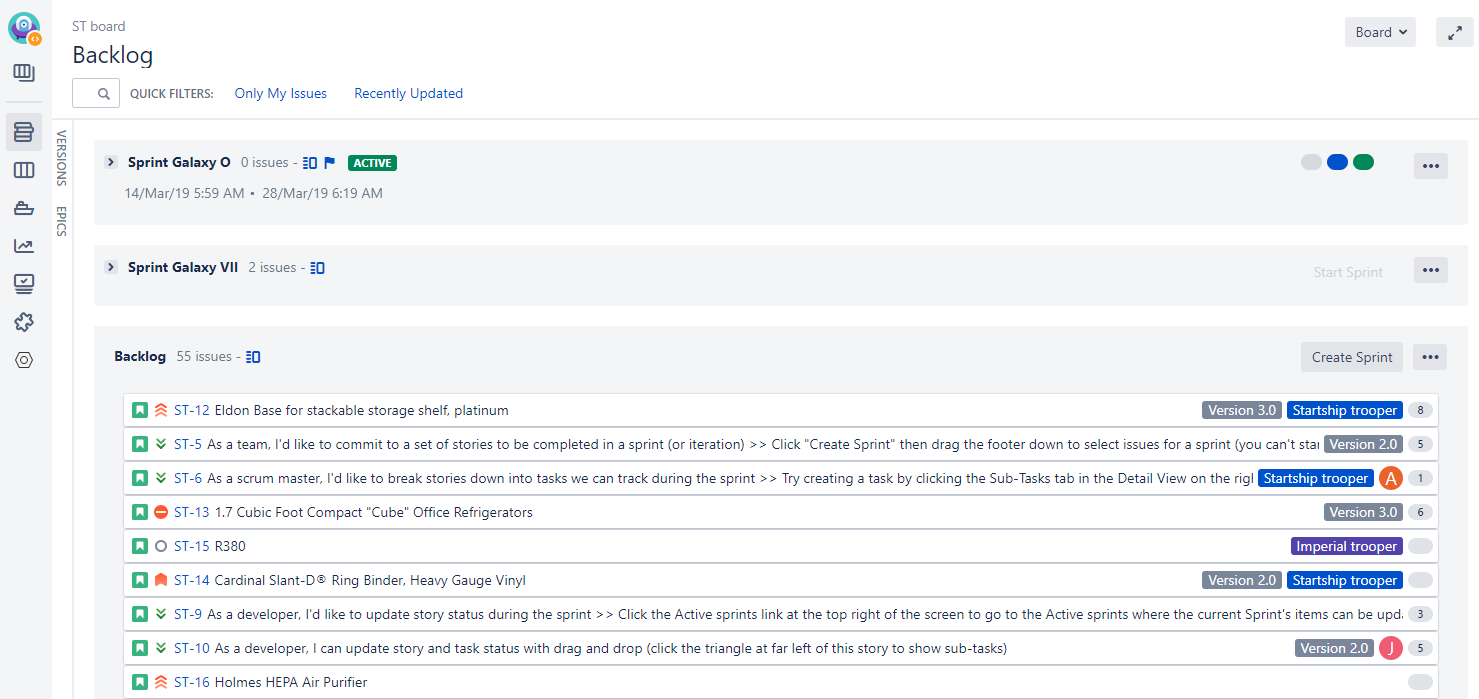
An example of a backlog in Jira Software containing 65 requests of different types (story, bug, etc.).
Defining the requests to be processed in the backlog
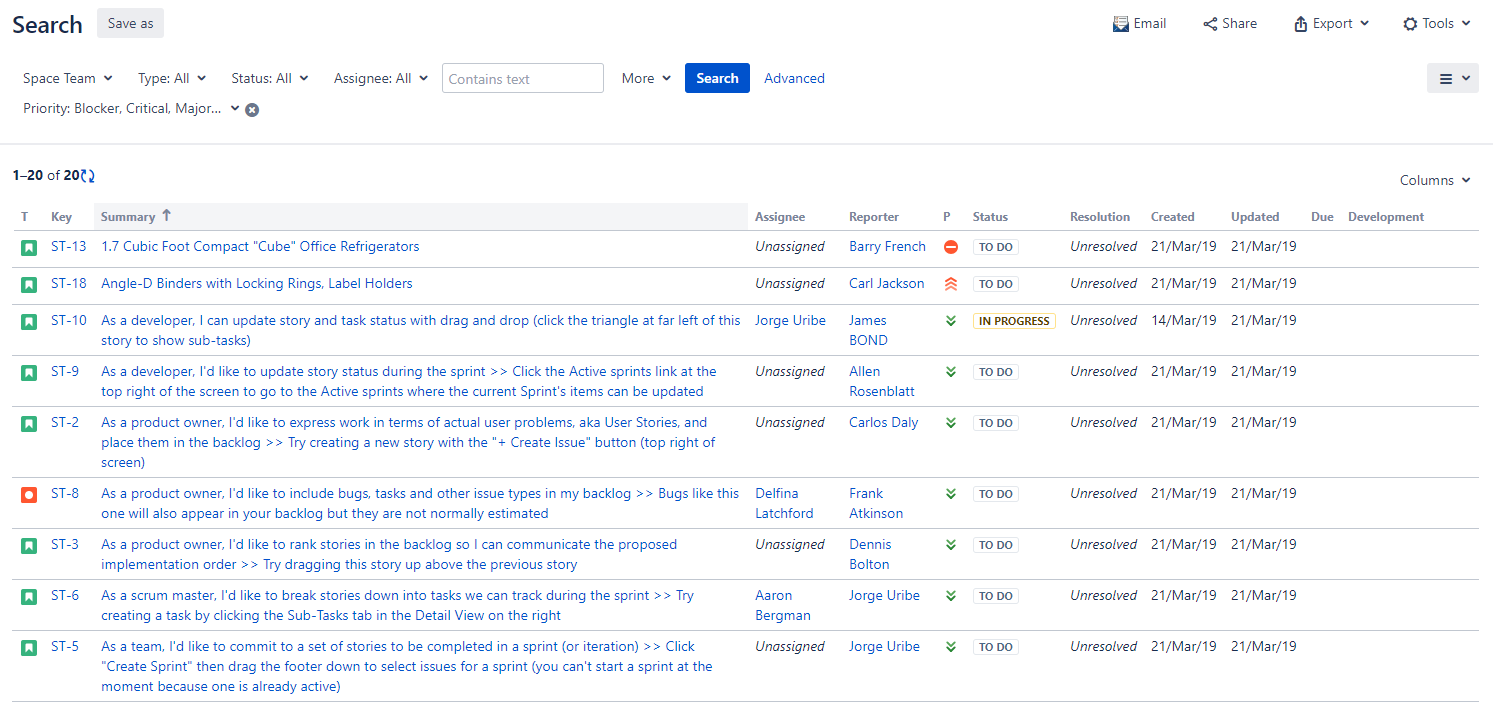
By using the request browser, you can search through all tickets linked to one or more Jira projects. These searches can then be saved as filters.
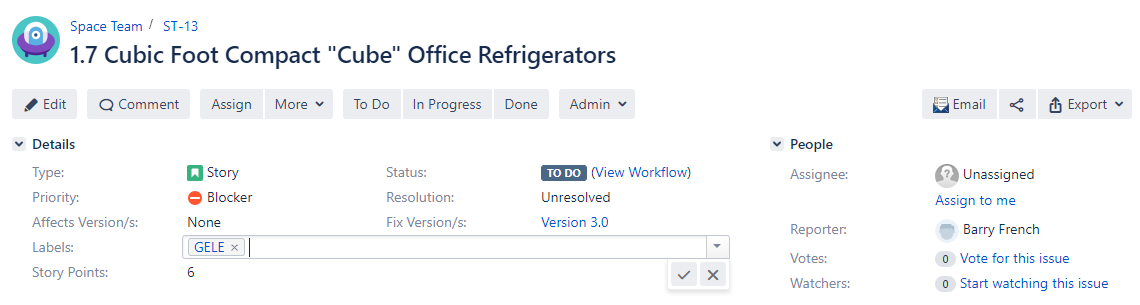
Filters allow you to organize the backlog in greater detail. For example, with filters, you could remove all requests with unspecified priority or priority lower than “Minor”, as in the screenshot below:
How do I define requests in my backlog?
There are several ways to define the requests to be processed in your backlog. Below, we will list some examples and you can choose the option that seems most suited to your needs:
- Update the resolutions fields in your Jira instance and close any requests that should not be listed in the backlog, even if they have not been processed. Some examples of resolution statuses to deselect: “Abandoned”, “Not specified”, “Not realizable”.
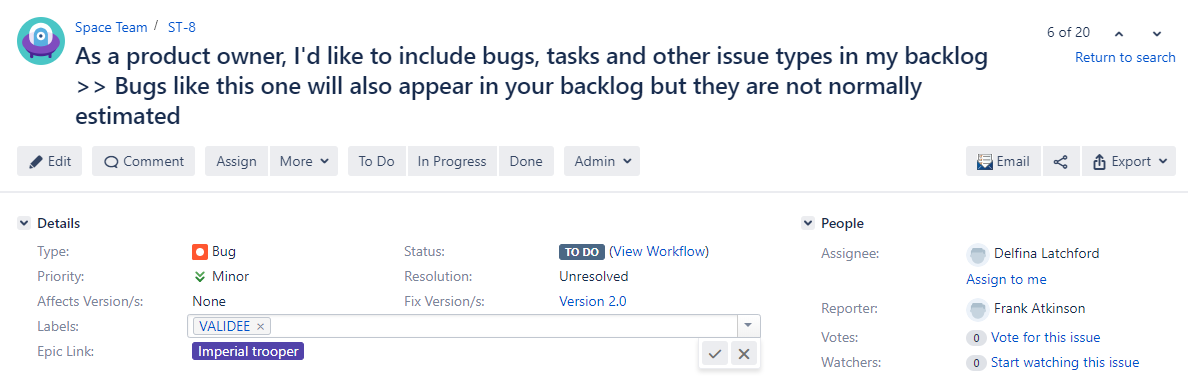
- Create a specific label to manage your backlog. Some examples: “for backlog”, “validated”, or conversely, “frozen”, “not taken into account”, etc.
- Create a component or a custom field and, as in the two previous cases, use the logic that suits you the best. Component examples: “Out of scope”, “Validated”, “For development”.
Whichever option you choose, keep in mind that you are creating a filter to see requests, which must be present in the backlog.
The use of the resolution method does not require a specific change in the backlog configuration. We will use the labels method later, in our article. However, be aware that the components or custom field method follows the same principle as the labels method: you have to pull up the request and edit it to implement the value used to define it.
Where are the requests not visible from my backlog?
Your requests are no longer present in your backlog, but do not worry – they are still in Jira. If you have to integrate them into your backlog, you only need to make your request eligible for your filter. In our previous example, you would simply need to set a priority of “Minor” or higher.
Updating Requests
Now that you know how to define which requests will be in your backlog and which method to use to find your requests, we will see how to organize your backlog.
A product manager will have to update the impacted requests according the logic you have chosen (“I define the requests visible in my backlog” or “I define the requests hidden from the backlog”).
Updating my filter for the backlog
Finally, we will update the filter used to generate the backlog.
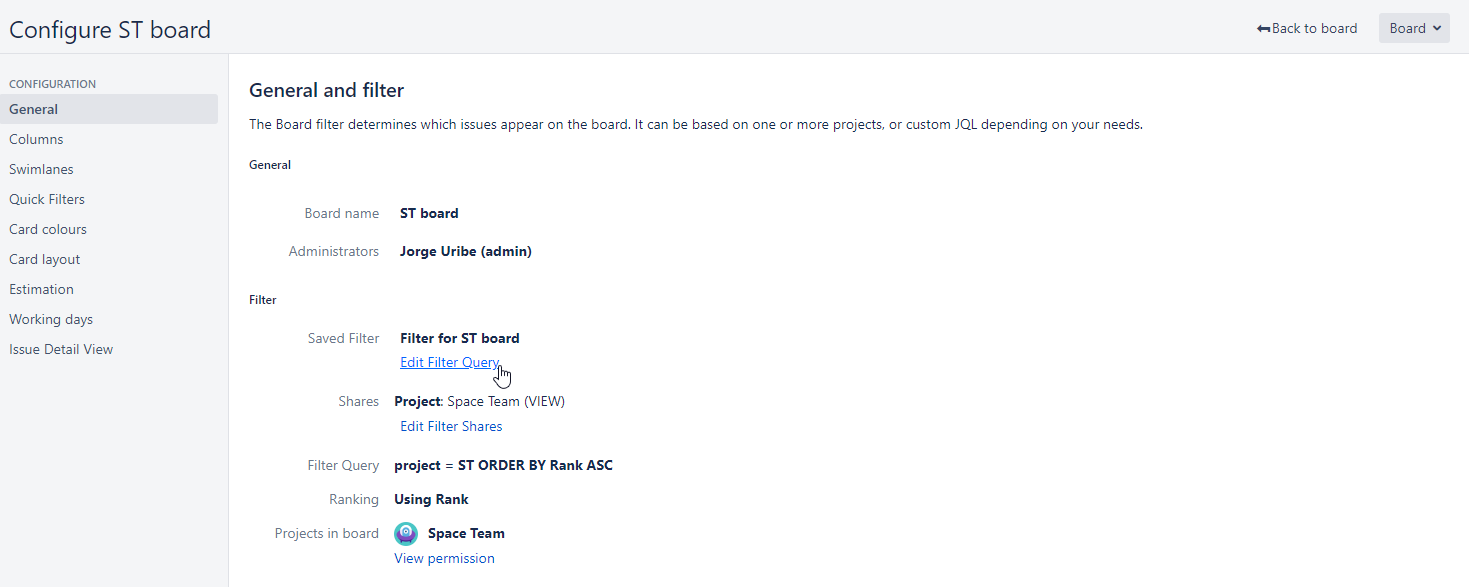
Go to your dashboard and click on “Board” → “Configure”. (You need to have administrative rights for the dashboard to access this feature).
In the new view, check that you are in the “General” category, then click on “Edit Filter Query”.
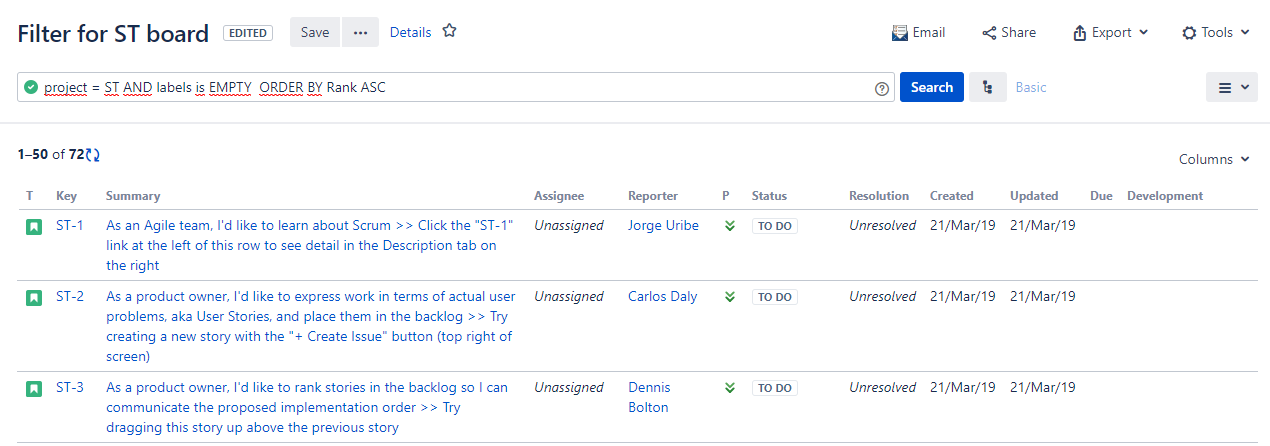
Next, return to your backlog. It has been updated, and now you only see the requests that interest you!
Congratulations! You have just learned how to organize a product backlog in Jira and archive requests for future needs.
I hope you found this tutorial useful. If you have any questions, leave us a comment below.
Contact us